Are you looking for an easy way to make quilt show ribbons? Don’t want to do the math or make a special run to the store for supplies? This tutorial will show you how to make simple and customizable award ribbons using fabric and other items you probably already have in your sewing room.
But first, a little background.
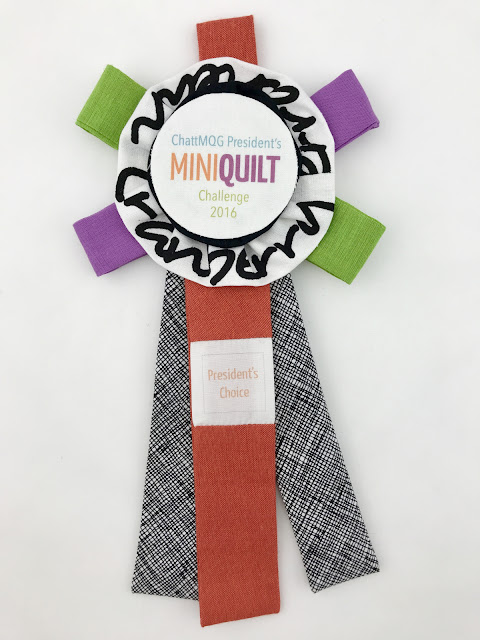
In 2016 and 2017, ChattMQG presidents Audrey Workman and Kelly Spell issued challenges to members to make quilts for two end-of-year shows that hung during the guild’s December meetings. Inspired by the gorgeous QuiltCon ribbons made by Nicole Daksiewicz of Modern Handcraft, Audrey made several ribbons for her 2016 President’s Mini Quilt Challenge — you can see one here:
Thankfully, Audrey kept copious notes as she went along. In 2017, Kelly made some minor edits as she made the ribbon for her Curves Challenge. The following instructions are a mashup of their processes.
What You Need
The following items will make one award ribbon measuring approximately 4.5” wide and 9.5” tall. As you select your fabrics, keep in mind that award ribbons are a great scrap-busting project!
- One 3” x 16” strip of fabric for the outer ruffle
- One 3” x 12” strip of fabric for the inner ruffle
- Two 4” x 4” squares of white fabric for the center badge
- Two 1 3/4” x 14” strips of fabric for the outer ribbons
- One 1 3/4” x 14” strip of fabric for the inner ribbon
- One 1” pin back
- White stiffened felt (or ultra firm stabilizer) for the badge backing
- Freezer paper
- Iron-on interfacing
- Plain printer paper
- Glue stick
- Hot glue gun or craft glue
Center Badge
To start, you need to design the graphic you want to print on your center badge. This can be a logo, simple text, or a combination of the two. If you’re proficient in Adobe Illustrator, Photoshop, or a comparable software program, use that. If not, we recommend Canva.com, a free graphic-design website that is very easy to use.
Create an account and then use Canva’s custom dimensions feature to create a blank 3” x 3” canvas. For the Curves Challenge ribbon, Kelly added a light gray circle to the canvas and centered the text inside it.
Once you’re satisfied with your graphic, save it to your computer and prepare for printing. If you have a button maker, you can print your graphic on paper and use the button maker to create your center badge. If you don’t have a button maker, don't worry. Follow these steps to make your center badge out of fabric.
Grab the freezer paper and one 4” x 4” square of white fabric. Place the shiny side of the freezer paper against the wrong side of the fabric and press with a hot iron. The freezer paper will temporarily stick to the fabric and stabilize it for printing.
Next, lightly glue the whole thing to a piece of plain printer paper—the right side of the fabric is facing up, and the freezer paper is now stuck to the printer paper. You’re ready to print your graphic onto fabric! Check your printer settings and make sure you print your graphic at 100 percent scale.
After printing, peel the fabric off the freezer paper and apply a medium-to-heavy weight interfacing to the wrong side of the fabric. Then place it on top of the second 4” x 4” square piece of white fabric (right sides together) and sew a circle, using the grey outline of the graphic as a guide. Trim the seam allowance so it is a scant 1/4” around the circle, and clip it. Use scissors to cut a slit in the plain white backing fabric, then turn the right side out through the hole.
Voila! Set it aside.
Outer Ruffle
Take your 3” x 16” strip of fabric, fold it in half along the long edge with wrong sides together, and press. Use your favorite method to gather the fabric into a ruffle (we like the machine method demonstrated here), and shape it into a circle with the raw edges on the inside. Tie your basting threads into a knot to hold the circle in place, then set aside.
Inner Ruffle
Take your 3” x 12” strip of fabric and follow the instructions above to create the inner ruffle. Place the outer ruffle on a table with the right side facing up, and center the inner ruffle on top of it with the right side facing up. Pin the two ruffles in place and then sew a basting stitch around the inner circle to hold them together.
Ribbons
Now it’s time to make the ribbons. Gather one 1 3/4” x 14” strip of fabric and fold it in half along the short edge with right sides together. Starting at the folded edge, sew a scant 1/4” seam down each side to create a tube; backstitch at the beginning and end of the seam. Turn the tube right-side out and press. Repeat for the other two ribbons, then arrange all three in the manner you want them to hang, and baste them together.
Badge Backing
Grab your white stiffened felt and draw two circles approximately 2.5” in diameter. (The bottom of a large basting spray can is the perfect size for tracing!) Cut out the circles and set aside.
Assembly
You’re almost finished! To assemble the ribbon, gather the following items: the outer and inner ruffles, the center badge, the felt badge backing circles, the basted ribbons, a pin back, and glue.
Position the ribbons on top of one felt circle and baste them into place. Then add several dabs of glue to the ribbon-basted circle and place the second felt circle on top of it, sandwiching the ribbons in between; use clips or a heavy book to hold the pieces in place while the glue dries.
Now add several dabs of glue to the inner ruffle, right on top of the basting stitches, and place the center badge on top of it with the right side facing you. Press the pieces to bond them together, and set aside to let the glue dry.
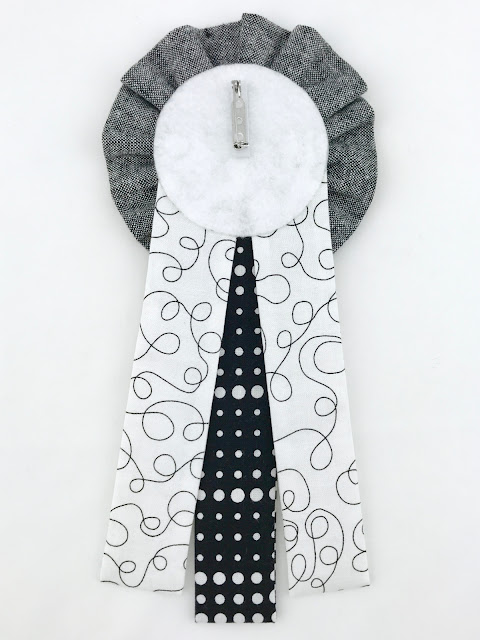
Finally, glue the ruffle unit to the right side of the ribbon unit. Once it is dry, glue the pin back to the back side—now your ribbon is ready to hang!
Customization
Once you complete one ribbon, you will likely be inspired to add your own customizations. You can add ribbons to the back of the center badge (as Audrey did in 2016), enlarge the overall size of the ruffles, and more—the possibilities are endless.
We hope this tutorial was helpful! If you have any questions, let us know in the comment section.


Thank you! Awesome tutorial!
ReplyDelete